

If travel or landscape photography is your thing, you definitely want to have control over your shots. In this case, a polarizing filter is a must. For those unfamiliar with the term, the purpose of this adapted glass is to manage reflections and suppress glare. These dark filters have a huge impact on skies and water, not to mention on glass surfaces, and can save you lots of hours of post – processing. Keep reading to learn how to use a polarizing filter and get the best from your photographs!
CIRCULAR POLARIZING FILTERS
The most common ones are the circular polarizing filters, also known as CPL, which contain a rotating element for quick adjustment. Circular filters are great for digital shots, since they will not confuse your camera´s autofocus. Film photographers, on the other hand, use linear filters. Most lenses have a screw – over filter thread in their front part, allowing the user to mount any matching size filter. CPLs can be rotated either clockwise or counterclockwise to increase or decrease the effect of the filter, that will vary depending on the position of the sun.
A polarizing filter is nothing but two pieces of glass put together. When a CPL is attached to the end of your lens, you will be able to modify the direction in which the light is polarized. Bear in mind that the effect by a polarizing filter cannot be replicated in post – production. This means you will never get the same result, no matter how hard you try.
COMPLETELY WORTH THE HYPE
When it comes to priorities, polarized filters are arguably more important than a secondary lens. Think about it: why would you buy a new lens that will cost you an arm and a leg when you can improve the quality of your photographs in a much more wallet – friendly way? Polarized filters are readily available and will also protect your beloved lens from scratches. Do yourself a favour and get one ASAP!
THE POLARIZING PROCESS
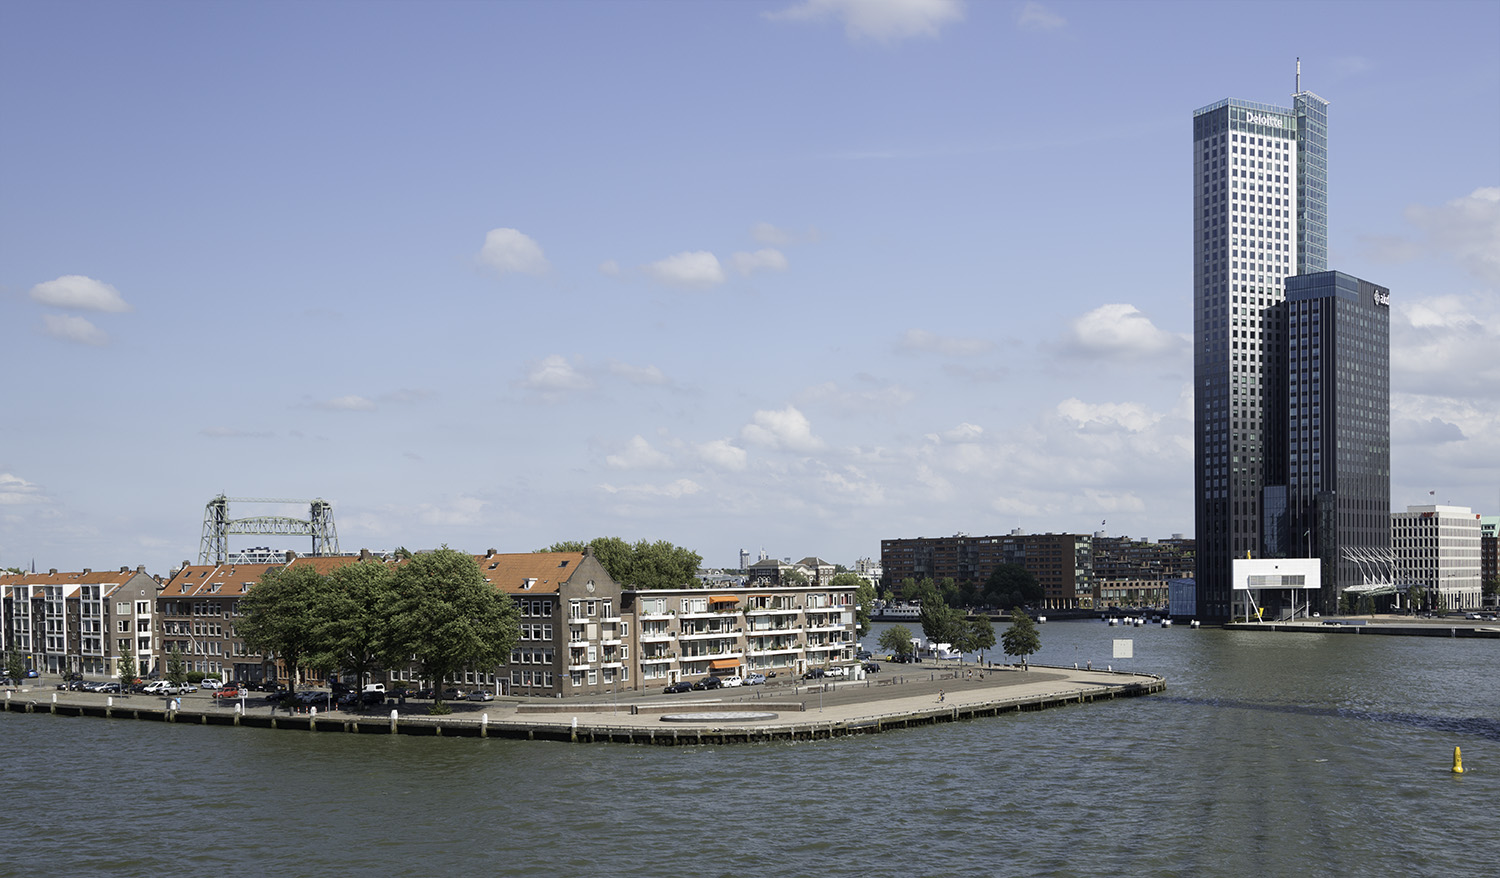
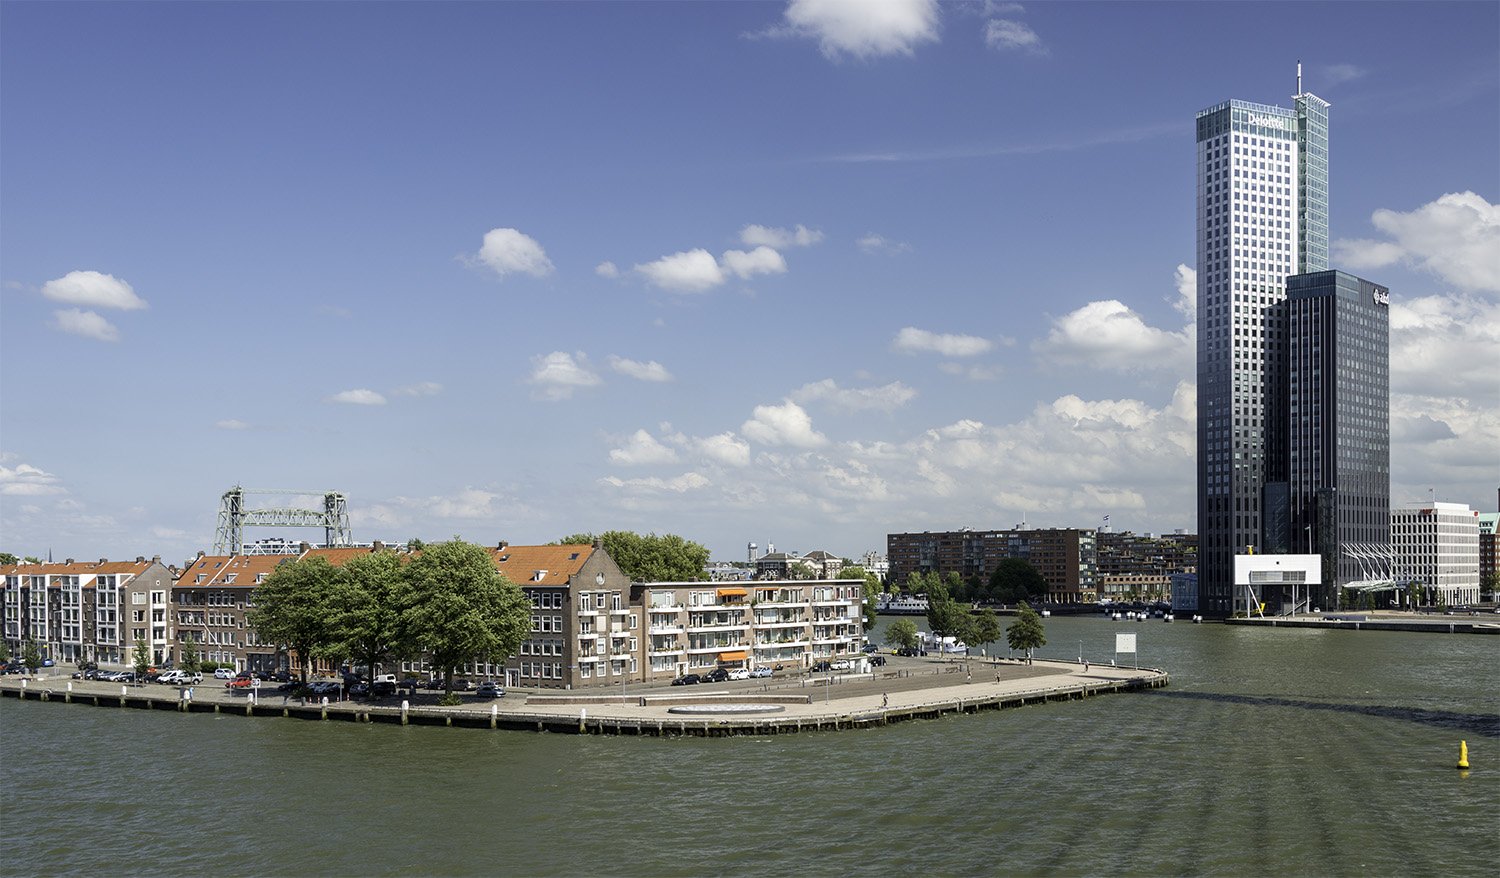
Light reflected from a non – metallic surface becomes polarized. A CPL, used in the correct direction, will filter out the polarized component of light, darkening the sky and making the clouds look more dramatic. Once the polarized waves are absorbed, water and foliage will also be emphasized, since the natural colors and details beneath the reflections will come out. Polarizing filters can work wonders in spicing up a photograph!
IMPROVE YOUR EXPOSURE
One of the greatest frustrations when shooting landscapes comes from the lack of color. When shooting outdoors, you will often feel that your pictures come out overexposed and lifeless, especially if you were facing direct sunlight. However, there is more beyond cutting out reflections. Polarizers will allow only light from a certain direction, so all you need to do is rotate the filter until you obtain the desired effect. CPLs will also remove haze from photos, intensifying the blue color of the sky. Take your shots to the next level!
HIGHLIGHTS
The moisture and particles in the atmosphere that reflect light can definitely ruin a photograph. It´s called haze. It can somehow be removed on Photoshop or Lightroom, however, the images will end up looking muddy. Same goes for the saturation, which won´t look as natural when manipulated on a later stage. Without a polarizing filter, your edited images will look oversaturated. Being able to cut through haze reflections will result in a saturation you cannot add in during a post – production session. While software can stimulate many other types of filters, an image does not record the light polarization.
Although polarizing filters are mainly used for outdoor photography, they can also be used in portraiture: they will reduce undesired reflections in glasses or decrease the shine on people´s skin, creating an even illumination effect.

DRAWBACKS
The use of polarizers results in a bit of light loss, usually from one to two steps, depending on the polarization level. The main drawback is the dark spot these filters can create in your captions, which can be distracting sometimes. This dark sky can also be used to your advantage, though, since it is a potential creative tool. By rotating the filter, in order to darken the sky, you will obtain vibrant blue tones that will create an amazing contrast when converted into black and white.
When taking pictures with these filters, photographers need to set up the shooting, which means time. CPLs require attention and adjustment, because the effect of the filters depends on the circumstances. On top of that, sometimes it´s difficult to appreciate the changes in a small viewfinder, which can lead to the wrong settings.
Gradient skies can be tricky to deal with in a later stage, so be careful when using CPLs at sunrise and sunset times. Reducing the amount of sky on a photograph and decreasing the effect of the filter by rotating it seems to work well. However, when reframing is not an option, the best solution might be to remove the filter.
Remember that these filters will not work on metallic surfaces, so you will have to experiment by yourself to determine its effectiveness on specific materials, such as car paint.
Since they are nothing but another piece of glass in front of your lens, they can actually add more ghosting and flare to your pictures, especially when using a poor-quality CPL. These filters can also add undesirable vignetting to your captions. They are easily noticeable in the corners of the frame. Make sure the filter you purchase is not too thick!
HOW TO USE A POLARIZING FILTER
It is vital to understand that both time of the day and time of the year can impact the amount of polarization a photographer can get when using a CPL. It will usually darken your image, so put it away at night. Here are some aspects to consider when using a polarizing filter:
Position: These filters produce their best results when situated 90 degrees from the sun, and will have their least effect when the sun is behind the camera. Tip: form a pistol with your index and thumb fingers. Afterwards, point your index finger at the sun and move your thumb in any direction. The parts of the sky where your thumb points to will get the maximum amount of polarization.
Shutter speed: Make sure it is high enough to avoid underexposed photographs. The longer the shutter speed is, the more light your camera will be receiving. Use always a tripod if your shutter speed is longer than 1/30th. Otherwise, the picture will likely come up blurry.
ISO: You can also increase the ISO slightly if you shutter speed is too slow to shoot handheld. Remember that raising your ISO too much can result in a lot of grain, known as noise, which will lower the quality of the image. You should only modify the ISO when there is no other possibilty of brightening up your caption, which can be done by changing the shutter speed or the aperture.
White balance: Your camera should be set to day balance, to avoid confusing its automatic white balance when adding a dark filter.
Maintenance: You don´t want any debris or dust particles in your photographs, so make sure the front part of the lens and the filter are clean. Dirt could add more internal reflections, decreasing the quality of the captions.
PRICING OF POLARIZING FILTERS
Polarizing filters can cost from 20 to 200 USD. The difference lies in the quality of the glass. It would not make any sense to put a poor – quality filter over an expensive lens, which can be compared to shooting through a dirty window. Anytime we place an additional glass we risk lowering image quality. High-quality CPLs are made of the best glass (like B270 Schott glass) and covered with the best coatings, which help reduce glare caused by the filter itself. Multi-layer coatings are always a better choice than mono-layer coatings.
Make sure you purchase the size (in mm) that fits the thread diameter of your lens. The size is usually written on the lens. Unfortunately, there is not a filter that matches all the lenses, so you might want to consider buying multiple filters. Remember that, when it comes to very wide-angle lenses, adding a CPL risks vignetting in the corners of the image. For wide-angle lenses you really need a CPL with slim frame.
CONCLUSION
The disadvantages of using a polarizer filter are few compared to the benefits they bring. Even if they rob some light and make the skies look gradient, they will effectively reduce unwanted reflections and boost the color in your pictures. A polarizing filter is like getting your camera a pair of sunglasses: you don´t want to wear them all the time, but when the sun hits, you desperately need them. Get yourself a CLP! You will be impressed by the results.
ARE YOU READY TO IMPROVE YOUR PHOTOGRAPHY?
That was a lot of information! Hopefully you know what to expect of a polarizing filter now. Are you ready to improve your photography with this filter? We offer high quality CPL filters with a great value for money. And you can benefit from a 10% discount right now by using the coupon MYCPLNOW


